搜索到
35
篇与
的结果
-
![使用代理IP和访问控制策略提高爬虫效率]() 使用代理IP和访问控制策略提高爬虫效率 前言在进行网络爬虫工作时,经常会遇到被目标网站封禁的情况,尤其是频繁请求同一页面或同一接口时。为了解决这个问题,我们可以使用代理IP和访问控制来提高爬虫的稳定性和可靠性。本文将介绍如何使用代理IP和访问控制来优化爬虫的效率。一、爬虫代理IP的使用爬虫使用代理IP可以隐藏真实的访问源,模拟不同的用户请求,减少被封禁的可能性。以下是使用代理IP的一般步骤:1. 获取可用代理IP可以从代理IP提供商购买或使用免费的代理IP。免费的代理IP质量较低,容易被封禁,建议购买稳定可靠的代理IP。2. 验证代理IP的可用性通过发送请求到目标网站,验证代理IP是否可用。一般可以使用requests库发送HTTP请求,并根据返回的状态码来判断代理IP的有效性。import requests proxy = {'http': 'http://your_proxy_ip:your_proxy_port'} try: response = requests.get(url, proxies=proxy, timeout=5) if response.status_code == 200: print('代理IP可用') else: print('代理IP无效') except Exception as e: print('请求失败', e)3. 设置代理IP在爬虫程序中使用代理IP,使用requests库提供的proxies参数,将代理IP传入访问请求中,从而实现了使用代理IP请求网页的功能。import requests proxy = {'http': 'http://your_proxy_ip:your_proxy_port'} try: response = requests.get(url, proxies=proxy, timeout=5) if response.status_code == 200: print(response.text) else: print('请求失败') except Exception as e: print('请求失败', e)二、访问控制除了使用代理IP,访问控制也是一个重要的优化策略。通过设置访问频率和请求间隔,可以避免对目标网站造成过大的访问压力,进而减少被封禁的风险。以下是一些常用的访问控制方法:1. 设置请求头信息在发送请求时,设置User-Agent、Referer等请求头信息,模拟正常的用户请求。可以通过随机选择不同的User-Agent来增加请求的随机性。import requests headers = { 'User-Agent': 'Mozilla/5.0 (Windows NT 10.0; Win64; x64) AppleWebKit/537.36 (KHTML, like Gecko) Chrome/58.0.3029.110 Safari/537.3', 'Referer': 'http://www.example.com' } try: response = requests.get(url, headers=headers, timeout=5) if response.status_code == 200: print(response.text) else: print('请求失败') except Exception as e: print('请求失败', e)2. 设置访问频率和请求间隔在爬取过程中,设置合理的访问频率和请求间隔,避免过于频繁的请求。可以使用time模块的sleep方法来控制请求间隔时间。import requests import time headers = { 'User-Agent': 'Mozilla/5.0 (Windows NT 10.0; Win64; x64) AppleWebKit/537.36 (KHTML, like Gecko) Chrome/58.0.3029.110 Safari/537.3' } for i in range(10): try: response = requests.get(url, headers=headers, timeout=5) if response.status_code == 200: print(response.text) else: print('请求失败') except Exception as e: print('请求失败', e) time.sleep(5) # 每隔5秒发送一次请求三、综合应用在实际爬虫工作中,我们通常同时使用代理IP和访问控制来提高爬取的稳定性和可靠性。以下是一个综合应用的示例:import requests import random import time proxy_list = ['http://your_proxy_ip1:your_proxy_port1', 'http://your_proxy_ip2:your_proxy_port2'] # 代理IP列表 headers = { 'User-Agent': 'Mozilla/5.0 (Windows NT 10.0; Win64; x64) AppleWebKit/537.36 (KHTML, like Gecko) Chrome/58.0.3029.110 Safari/537.3', 'Referer': 'http://www.example.com' } for i in range(10): proxy = {'http': random.choice(proxy_list)} try: response = requests.get(url, headers=headers, proxies=proxy, timeout=5) if response.status_code == 200: print(response.text) else: print('请求失败') except Exception as e: print('请求失败', e) time.sleep(5) # 每隔5秒发送一次请求上述示例中,我们使用了随机选择代理IP的方式来模拟不同的访问源,同时设置了请求头信息和请求间隔。这样可以有效地提高爬虫的稳定性和可靠性。总结使用代理IP和访问控制是提高爬虫稳定性和可靠性的常用方法。通过使用不同的代理IP和设置合理的访问频率和请求间隔,我们可以减少被封禁的风险,提高爬虫的效率和成功率。在实际工作中,需要根据目标网站的具体情况来选择合适的代理IP和访问控制策略。在使用代理IP时,需要注意代理IP的质量和稳定性,避免使用低质量的代理IP,以免影响爬虫的效果。另外,使用代理IP和访问控制时也需要遵守相关法律法规和网站的使用规定,以免违规行为带来的法律风险和不良影响。
使用代理IP和访问控制策略提高爬虫效率 前言在进行网络爬虫工作时,经常会遇到被目标网站封禁的情况,尤其是频繁请求同一页面或同一接口时。为了解决这个问题,我们可以使用代理IP和访问控制来提高爬虫的稳定性和可靠性。本文将介绍如何使用代理IP和访问控制来优化爬虫的效率。一、爬虫代理IP的使用爬虫使用代理IP可以隐藏真实的访问源,模拟不同的用户请求,减少被封禁的可能性。以下是使用代理IP的一般步骤:1. 获取可用代理IP可以从代理IP提供商购买或使用免费的代理IP。免费的代理IP质量较低,容易被封禁,建议购买稳定可靠的代理IP。2. 验证代理IP的可用性通过发送请求到目标网站,验证代理IP是否可用。一般可以使用requests库发送HTTP请求,并根据返回的状态码来判断代理IP的有效性。import requests proxy = {'http': 'http://your_proxy_ip:your_proxy_port'} try: response = requests.get(url, proxies=proxy, timeout=5) if response.status_code == 200: print('代理IP可用') else: print('代理IP无效') except Exception as e: print('请求失败', e)3. 设置代理IP在爬虫程序中使用代理IP,使用requests库提供的proxies参数,将代理IP传入访问请求中,从而实现了使用代理IP请求网页的功能。import requests proxy = {'http': 'http://your_proxy_ip:your_proxy_port'} try: response = requests.get(url, proxies=proxy, timeout=5) if response.status_code == 200: print(response.text) else: print('请求失败') except Exception as e: print('请求失败', e)二、访问控制除了使用代理IP,访问控制也是一个重要的优化策略。通过设置访问频率和请求间隔,可以避免对目标网站造成过大的访问压力,进而减少被封禁的风险。以下是一些常用的访问控制方法:1. 设置请求头信息在发送请求时,设置User-Agent、Referer等请求头信息,模拟正常的用户请求。可以通过随机选择不同的User-Agent来增加请求的随机性。import requests headers = { 'User-Agent': 'Mozilla/5.0 (Windows NT 10.0; Win64; x64) AppleWebKit/537.36 (KHTML, like Gecko) Chrome/58.0.3029.110 Safari/537.3', 'Referer': 'http://www.example.com' } try: response = requests.get(url, headers=headers, timeout=5) if response.status_code == 200: print(response.text) else: print('请求失败') except Exception as e: print('请求失败', e)2. 设置访问频率和请求间隔在爬取过程中,设置合理的访问频率和请求间隔,避免过于频繁的请求。可以使用time模块的sleep方法来控制请求间隔时间。import requests import time headers = { 'User-Agent': 'Mozilla/5.0 (Windows NT 10.0; Win64; x64) AppleWebKit/537.36 (KHTML, like Gecko) Chrome/58.0.3029.110 Safari/537.3' } for i in range(10): try: response = requests.get(url, headers=headers, timeout=5) if response.status_code == 200: print(response.text) else: print('请求失败') except Exception as e: print('请求失败', e) time.sleep(5) # 每隔5秒发送一次请求三、综合应用在实际爬虫工作中,我们通常同时使用代理IP和访问控制来提高爬取的稳定性和可靠性。以下是一个综合应用的示例:import requests import random import time proxy_list = ['http://your_proxy_ip1:your_proxy_port1', 'http://your_proxy_ip2:your_proxy_port2'] # 代理IP列表 headers = { 'User-Agent': 'Mozilla/5.0 (Windows NT 10.0; Win64; x64) AppleWebKit/537.36 (KHTML, like Gecko) Chrome/58.0.3029.110 Safari/537.3', 'Referer': 'http://www.example.com' } for i in range(10): proxy = {'http': random.choice(proxy_list)} try: response = requests.get(url, headers=headers, proxies=proxy, timeout=5) if response.status_code == 200: print(response.text) else: print('请求失败') except Exception as e: print('请求失败', e) time.sleep(5) # 每隔5秒发送一次请求上述示例中,我们使用了随机选择代理IP的方式来模拟不同的访问源,同时设置了请求头信息和请求间隔。这样可以有效地提高爬虫的稳定性和可靠性。总结使用代理IP和访问控制是提高爬虫稳定性和可靠性的常用方法。通过使用不同的代理IP和设置合理的访问频率和请求间隔,我们可以减少被封禁的风险,提高爬虫的效率和成功率。在实际工作中,需要根据目标网站的具体情况来选择合适的代理IP和访问控制策略。在使用代理IP时,需要注意代理IP的质量和稳定性,避免使用低质量的代理IP,以免影响爬虫的效果。另外,使用代理IP和访问控制时也需要遵守相关法律法规和网站的使用规定,以免违规行为带来的法律风险和不良影响。 -
![电影天堂全部类型下的所有电影]() 电影天堂全部类型下的所有电影 # -*- coding:utf-8 -*- # @time:2025/7/9 9:50 # @author:张旭辉 # @file : 1-获取全国城市.py # @编辑器: PyCharm import time # 时间 import random # 随机数 import re # 正则表达式 一套规则 用于匹配符号条件的记录 from lxml import etree # 从lxml中导入etree 目的是为了解析网页源码 # 从myhttp.py文件中 导入模块 具体 函数是get_data from myhttp import get_data # 准备url 1 就是喜剧片的类型 第1页 2 3 for i in range(0,21): url = f"https://www.dytt8899.com/{i}/index.html" print(url) # 发送请求 response = get_data(url) # 获取数据 # 加载源码 html = etree.HTML(response.text) # xpath解析 # 获取当前类型电影的最大页码 类型转成int pagemax = int(html.xpath("//select/option[last()]/text()")[0].split(" ")[1]) for page in range(1,pagemax+1): # time.sleep(random.randint(1,10))# 睡觉 单位秒 随机范围1-10秒 if page == 1: url = f"https://www.dytt8899.com/{i}/index.html" else: url = f"https://www.dytt8899.com/{i}/index_{page}.html" # 再次发送请求 # 发送请求 response = get_data(url) # 获取数据 # 加载源码 html = etree.HTML(response.text) # 从第page页中取电影类型 type = ''.join(re.findall(r'[\u4e00-\u9fa5]+', html.xpath("//h1//font/text()")[0])) # 当前页的全部电影数据30条 tables = html.xpath("//div[@class='co_content8']/ul//table") print(f"============================正在下载【{type}】第{page}/{pagemax}页数据================================") with open(f"data/{type}.txt","a",encoding="utf-8") as f: f.write(f"\n---------------------------------{page}/{pagemax}-----------------------------------------\n") for table in tables: date = table.xpath(".//tr[3]/td[2]/font[1]/text()")[0] # 日期 score = table.xpath(".//tr[3]/td[2]/font[2]/text()")[0] # 评分 score = re.sub(r'\s+', ' ', score).strip() # 去了回车换行空格之后的评分 title_director = table.xpath(".//tr[4]/td[1]/p[1]/text()")[0] # 片名 导演 title_director = re.sub(r'\s+', ' ', title_director).strip() # 去了回车换行空格之后的 片名 导演 print(date,score,title_director) # 打印 f.write(f"{date} {score} {title_director}\n") # 写入文件 f.write(f"\n---------------------------------{page}-----------------------------------------\n") print(f"============================【{type}】第{page}/{pagemax}页数据下载完成================================") print(f"{type}下载完成")
电影天堂全部类型下的所有电影 # -*- coding:utf-8 -*- # @time:2025/7/9 9:50 # @author:张旭辉 # @file : 1-获取全国城市.py # @编辑器: PyCharm import time # 时间 import random # 随机数 import re # 正则表达式 一套规则 用于匹配符号条件的记录 from lxml import etree # 从lxml中导入etree 目的是为了解析网页源码 # 从myhttp.py文件中 导入模块 具体 函数是get_data from myhttp import get_data # 准备url 1 就是喜剧片的类型 第1页 2 3 for i in range(0,21): url = f"https://www.dytt8899.com/{i}/index.html" print(url) # 发送请求 response = get_data(url) # 获取数据 # 加载源码 html = etree.HTML(response.text) # xpath解析 # 获取当前类型电影的最大页码 类型转成int pagemax = int(html.xpath("//select/option[last()]/text()")[0].split(" ")[1]) for page in range(1,pagemax+1): # time.sleep(random.randint(1,10))# 睡觉 单位秒 随机范围1-10秒 if page == 1: url = f"https://www.dytt8899.com/{i}/index.html" else: url = f"https://www.dytt8899.com/{i}/index_{page}.html" # 再次发送请求 # 发送请求 response = get_data(url) # 获取数据 # 加载源码 html = etree.HTML(response.text) # 从第page页中取电影类型 type = ''.join(re.findall(r'[\u4e00-\u9fa5]+', html.xpath("//h1//font/text()")[0])) # 当前页的全部电影数据30条 tables = html.xpath("//div[@class='co_content8']/ul//table") print(f"============================正在下载【{type}】第{page}/{pagemax}页数据================================") with open(f"data/{type}.txt","a",encoding="utf-8") as f: f.write(f"\n---------------------------------{page}/{pagemax}-----------------------------------------\n") for table in tables: date = table.xpath(".//tr[3]/td[2]/font[1]/text()")[0] # 日期 score = table.xpath(".//tr[3]/td[2]/font[2]/text()")[0] # 评分 score = re.sub(r'\s+', ' ', score).strip() # 去了回车换行空格之后的评分 title_director = table.xpath(".//tr[4]/td[1]/p[1]/text()")[0] # 片名 导演 title_director = re.sub(r'\s+', ' ', title_director).strip() # 去了回车换行空格之后的 片名 导演 print(date,score,title_director) # 打印 f.write(f"{date} {score} {title_director}\n") # 写入文件 f.write(f"\n---------------------------------{page}-----------------------------------------\n") print(f"============================【{type}】第{page}/{pagemax}页数据下载完成================================") print(f"{type}下载完成") -
![电影天堂某分类下的所有电影]() 电影天堂某分类下的所有电影 # -*- coding:utf-8 -*- # @time:2025/7/9 9:50 # @author:张旭辉 # @编辑器: PyCharm import time # 时间 import random # 随机数 import re # 正则表达式 一套规则 用于匹配符号条件的记录 from lxml import etree # 从lxml中导入etree 目的是为了解析网页源码 # 从myhttp.py文件中 导入模块 具体 函数是get_data from myhttp import get_data # 准备url 1 就是喜剧片的类型 第1页 url = "https://www.dytt8899.com/2/index.html" # 发送请求 response = get_data(url) # 获取数据 # 加载源码 html = etree.HTML(response.text) # xpath解析 # 获取当前类型电影的最大页码 类型转成int pagemax = int(html.xpath("//select/option[last()]/text()")[0].split(" ")[1]) for page in range(1,pagemax+1): time.sleep(random.randint(1,10))# 睡觉 单位秒 随机范围1-10秒 if page == 1: url = "https://www.dytt8899.com/1/index.html" else: url = f"https://www.dytt8899.com/1/index_{page}.html" print(f"============================正在下载第{page}页数据================================") # 再次发送请求 # 发送请求 response = get_data(url) # 获取数据 # 加载源码 html = etree.HTML(response.text) # 从第page页中取电影类型 type = ''.join(re.findall(r'[\u4e00-\u9fa5]+', html.xpath("//h1//font/text()")[0])) # 当前页的全部电影数据30条 tables = html.xpath("//div[@class='co_content8']/ul//table") with open(f"data/{type}.txt","a",encoding="utf-8") as f: f.write(f"\n---------------------------------{page}-----------------------------------------\n") for table in tables: date = table.xpath(".//tr[3]/td[2]/font[1]/text()")[0] # 日期 score = table.xpath(".//tr[3]/td[2]/font[2]/text()")[0] # 评分 score = re.sub(r'\s+', ' ', score).strip() # 去了回车换行空格之后的评分 title_director = table.xpath(".//tr[4]/td[1]/p[1]/text()")[0] # 片名 导演 title_director = re.sub(r'\s+', ' ', title_director).strip() # 去了回车换行空格之后的 片名 导演 print(date,score,title_director) # 打印 f.write(f"{date} {score} {title_director}\n") # 写入文件 f.write(f"\n---------------------------------{page}-----------------------------------------\n") print(f"============================第{page}页数据下载完成================================") print("下载完成")
电影天堂某分类下的所有电影 # -*- coding:utf-8 -*- # @time:2025/7/9 9:50 # @author:张旭辉 # @编辑器: PyCharm import time # 时间 import random # 随机数 import re # 正则表达式 一套规则 用于匹配符号条件的记录 from lxml import etree # 从lxml中导入etree 目的是为了解析网页源码 # 从myhttp.py文件中 导入模块 具体 函数是get_data from myhttp import get_data # 准备url 1 就是喜剧片的类型 第1页 url = "https://www.dytt8899.com/2/index.html" # 发送请求 response = get_data(url) # 获取数据 # 加载源码 html = etree.HTML(response.text) # xpath解析 # 获取当前类型电影的最大页码 类型转成int pagemax = int(html.xpath("//select/option[last()]/text()")[0].split(" ")[1]) for page in range(1,pagemax+1): time.sleep(random.randint(1,10))# 睡觉 单位秒 随机范围1-10秒 if page == 1: url = "https://www.dytt8899.com/1/index.html" else: url = f"https://www.dytt8899.com/1/index_{page}.html" print(f"============================正在下载第{page}页数据================================") # 再次发送请求 # 发送请求 response = get_data(url) # 获取数据 # 加载源码 html = etree.HTML(response.text) # 从第page页中取电影类型 type = ''.join(re.findall(r'[\u4e00-\u9fa5]+', html.xpath("//h1//font/text()")[0])) # 当前页的全部电影数据30条 tables = html.xpath("//div[@class='co_content8']/ul//table") with open(f"data/{type}.txt","a",encoding="utf-8") as f: f.write(f"\n---------------------------------{page}-----------------------------------------\n") for table in tables: date = table.xpath(".//tr[3]/td[2]/font[1]/text()")[0] # 日期 score = table.xpath(".//tr[3]/td[2]/font[2]/text()")[0] # 评分 score = re.sub(r'\s+', ' ', score).strip() # 去了回车换行空格之后的评分 title_director = table.xpath(".//tr[4]/td[1]/p[1]/text()")[0] # 片名 导演 title_director = re.sub(r'\s+', ' ', title_director).strip() # 去了回车换行空格之后的 片名 导演 print(date,score,title_director) # 打印 f.write(f"{date} {score} {title_director}\n") # 写入文件 f.write(f"\n---------------------------------{page}-----------------------------------------\n") print(f"============================第{page}页数据下载完成================================") print("下载完成") -
![梨视频视频爬取]() 梨视频视频爬取 # -*- coding:utf-8 -*- # @time:2025/7/8 10:10 # @author:张旭辉 # @file : zhang.py # @编辑器: PyCharm import requests def get_data(url): headers = { "user-agent":"Mozilla/5.0 (Windows NT 10.0; Win64; x64) AppleWebKit/537.36 (KHTML, like Gecko) Chrome/138.0.0.0 Safari/537.36", } response = requests.get(url=url,headers=headers) response.encoding = response.apparent_encoding return response def get_video_url(url,contId,params): headers = { "user-agent":"Mozilla/5.0 (Windows NT 10.0; Win64; x64) AppleWebKit/537.36 (KHTML, like Gecko) Chrome/138.0.0.0 Safari/537.36", "cookie":'PEAR_UUID=d6f6a867-a448-4561-9861-0170363cfa46; _uab_collina=175188032684858668947395; p_h5_u=EDC6CA6A-43EB-4E01-B161-70C22435000A; Hm_lvt_9707bc8d5f6bba210e7218b8496f076a=1751880327,1752203335; HMACCOUNT=15F47A8122133E49; Hm_lpvt_9707bc8d5f6bba210e7218b8496f076a=1752203336; tgw_l7_route=e0ec575606f95cc9ad003a83f9f8574f; JSESSIONID=7E3F76514FB7332116890EA82275AA69', "referer":f"https://www.pearvideo.com/video_{contId}" } # verify = False 发送get请求的时候 不去校验证书 response = requests.get(url=url,headers=headers,params=params) response.encoding = response.apparent_encoding return response # 准备当前页面url地址 url = "https://www.pearvideo.com/video_1801228" # 从url中获取当前视频的id contId = url.split("_")[-1] # 向指定服务器发送请求 video_url = "https://www.pearvideo.com/videoStatus.jsp" response = get_video_url(video_url,contId,params={"contId":contId}) # 获取视频假地址 srcUrl = response.json()['videoInfo']['videos']['srcUrl'] # 假地址: https://video.pearvideo.com/mp4/short/20250709/1752204172726-16056591-hd.mp4 print(srcUrl) # 真实地址:https://video.pearvideo.com/mp4/short/20250709/cont-1801228-16056591-hd.mp4 # 需要把 1752204172726 替换成 cont-1801228 # 1.根据srcUrl 提取对应的这串数字 fake = srcUrl.split('/')[-1].split('-')[0] print(fake) # 2.替换 real_video_url = srcUrl.replace(fake,f"cont-{contId}") print(real_video_url) # 向真实视频地址发送请求保存数据 response = get_data(real_video_url) # 下载到本地 print("正在下载") with open(f"{contId}.mp4","wb") as f: f.write(response.content) print("下载完成")
梨视频视频爬取 # -*- coding:utf-8 -*- # @time:2025/7/8 10:10 # @author:张旭辉 # @file : zhang.py # @编辑器: PyCharm import requests def get_data(url): headers = { "user-agent":"Mozilla/5.0 (Windows NT 10.0; Win64; x64) AppleWebKit/537.36 (KHTML, like Gecko) Chrome/138.0.0.0 Safari/537.36", } response = requests.get(url=url,headers=headers) response.encoding = response.apparent_encoding return response def get_video_url(url,contId,params): headers = { "user-agent":"Mozilla/5.0 (Windows NT 10.0; Win64; x64) AppleWebKit/537.36 (KHTML, like Gecko) Chrome/138.0.0.0 Safari/537.36", "cookie":'PEAR_UUID=d6f6a867-a448-4561-9861-0170363cfa46; _uab_collina=175188032684858668947395; p_h5_u=EDC6CA6A-43EB-4E01-B161-70C22435000A; Hm_lvt_9707bc8d5f6bba210e7218b8496f076a=1751880327,1752203335; HMACCOUNT=15F47A8122133E49; Hm_lpvt_9707bc8d5f6bba210e7218b8496f076a=1752203336; tgw_l7_route=e0ec575606f95cc9ad003a83f9f8574f; JSESSIONID=7E3F76514FB7332116890EA82275AA69', "referer":f"https://www.pearvideo.com/video_{contId}" } # verify = False 发送get请求的时候 不去校验证书 response = requests.get(url=url,headers=headers,params=params) response.encoding = response.apparent_encoding return response # 准备当前页面url地址 url = "https://www.pearvideo.com/video_1801228" # 从url中获取当前视频的id contId = url.split("_")[-1] # 向指定服务器发送请求 video_url = "https://www.pearvideo.com/videoStatus.jsp" response = get_video_url(video_url,contId,params={"contId":contId}) # 获取视频假地址 srcUrl = response.json()['videoInfo']['videos']['srcUrl'] # 假地址: https://video.pearvideo.com/mp4/short/20250709/1752204172726-16056591-hd.mp4 print(srcUrl) # 真实地址:https://video.pearvideo.com/mp4/short/20250709/cont-1801228-16056591-hd.mp4 # 需要把 1752204172726 替换成 cont-1801228 # 1.根据srcUrl 提取对应的这串数字 fake = srcUrl.split('/')[-1].split('-')[0] print(fake) # 2.替换 real_video_url = srcUrl.replace(fake,f"cont-{contId}") print(real_video_url) # 向真实视频地址发送请求保存数据 response = get_data(real_video_url) # 下载到本地 print("正在下载") with open(f"{contId}.mp4","wb") as f: f.write(response.content) print("下载完成") -
![获取豆瓣电影所有分类下的所有电影下的每部电影的前100条好评]() 获取豆瓣电影所有分类下的所有电影下的每部电影的前100条好评 # 导入xpath模块 用于解析页面数据 from lxml import etree # 导入系统模块 用于自动创建目录 import os # 导入requests模块用于发送http请求 import requests import json # 发起请求获取数据 def get_content(url,data=[],ispost=0): # user-agent 设置头信息 模拟浏览器访问 headers = { "User-Agent": "Mozilla/5.0 (Windows NT 6.1; WOW64) AppleWebKit/537.36 (KHTML, like Gecko) Chrome/63.0.3239.132 Safari/537.36", } if ispost: response = requests.post(url=url, headers=headers,data=data) else: response = requests.get(url=url, headers=headers) response.encoding = response.apparent_encoding return response.text # 根据电影Id获取电影的评论 def getCommentByMovieId(typeName,movieId,limit=100): try: url = f"https://movie.douban.com/subject/{movieId}/comments?percent_type=h&limit={limit}&status=P&sort=new_score" # 发送请求 获取页面源码 result = get_content(url) # 获取数据 etree1 = etree.HTML(result) # xpath解析 # 标题 title = etree1.xpath("//h1/text()")[0] # 评论人 authors = etree1.xpath("//span[@class='comment-info']/a/text()") # 评论时间 times = etree1.xpath("//span[@class='comment-info']/span[@class='comment-time ']/text()") # 评论内容 contents = etree1.xpath("//span[@class='short']/text()") moviePath = f"./movieCommentData/{typeName}" if not os.path.exists(moviePath): os.makedirs(moviePath) # 依次遍历,输出数据 s = "=" print(f"{s * 30}正在获取电影【{title}】{s * 30}") for i in range(len(authors)): print(f"评论人:'{authors[i]}'---评论内容:'{contents[i]}---评论时间:'{times[i].strip()}''") filename = moviePath + '/' + title + '.txt' with open(filename, 'a+', encoding="utf-8") as f: f.write(f"评论人:'{authors[i]}'---评论内容:'{contents[i]}'---评论时间:'{times[i].strip()}'\n") f.close() print(f"{s * 30}电影【{title}】获取完毕{s * 30}") except: pass url = "https://movie.douban.com/chart" # 发送请求 获取页面源码 result = get_content(url) # 获取数据 etree1 = etree.HTML(result) # xpath解析 typeUrl = etree1.xpath("//div[@class='types']/span/a/@href") typeUrlList = [] for url in typeUrl: typeName = url.split("&")[0].split('=')[1] print(f"正在获取【{typeName}】分类下的电影信息......") typeId = url.split("&")[1].split("=")[1] # 根据电影分类获取此分类下的电影总数 totalUrl = f"https://movie.douban.com/j/chart/top_list_count?type={typeId}&interval_id=100%3A90&action=" # 获取到此分类下的电影总数量 movieTotal = json.loads(get_content(totalUrl))['total'] print(f"{typeName}分类下的电影一共有{movieTotal}部") # 根据电影总数量依次获取这些电影 for i in range(movieTotal+1): baseUrl = f"https://movie.douban.com/j/chart/top_list?type={typeId}&interval_id=100%3A90&action=&start={i}&limit=1" movieInfo = json.loads(get_content(baseUrl))[0] # 获取电影Id movieId = movieInfo['id'] getCommentByMovieId(typeName,movieId)
获取豆瓣电影所有分类下的所有电影下的每部电影的前100条好评 # 导入xpath模块 用于解析页面数据 from lxml import etree # 导入系统模块 用于自动创建目录 import os # 导入requests模块用于发送http请求 import requests import json # 发起请求获取数据 def get_content(url,data=[],ispost=0): # user-agent 设置头信息 模拟浏览器访问 headers = { "User-Agent": "Mozilla/5.0 (Windows NT 6.1; WOW64) AppleWebKit/537.36 (KHTML, like Gecko) Chrome/63.0.3239.132 Safari/537.36", } if ispost: response = requests.post(url=url, headers=headers,data=data) else: response = requests.get(url=url, headers=headers) response.encoding = response.apparent_encoding return response.text # 根据电影Id获取电影的评论 def getCommentByMovieId(typeName,movieId,limit=100): try: url = f"https://movie.douban.com/subject/{movieId}/comments?percent_type=h&limit={limit}&status=P&sort=new_score" # 发送请求 获取页面源码 result = get_content(url) # 获取数据 etree1 = etree.HTML(result) # xpath解析 # 标题 title = etree1.xpath("//h1/text()")[0] # 评论人 authors = etree1.xpath("//span[@class='comment-info']/a/text()") # 评论时间 times = etree1.xpath("//span[@class='comment-info']/span[@class='comment-time ']/text()") # 评论内容 contents = etree1.xpath("//span[@class='short']/text()") moviePath = f"./movieCommentData/{typeName}" if not os.path.exists(moviePath): os.makedirs(moviePath) # 依次遍历,输出数据 s = "=" print(f"{s * 30}正在获取电影【{title}】{s * 30}") for i in range(len(authors)): print(f"评论人:'{authors[i]}'---评论内容:'{contents[i]}---评论时间:'{times[i].strip()}''") filename = moviePath + '/' + title + '.txt' with open(filename, 'a+', encoding="utf-8") as f: f.write(f"评论人:'{authors[i]}'---评论内容:'{contents[i]}'---评论时间:'{times[i].strip()}'\n") f.close() print(f"{s * 30}电影【{title}】获取完毕{s * 30}") except: pass url = "https://movie.douban.com/chart" # 发送请求 获取页面源码 result = get_content(url) # 获取数据 etree1 = etree.HTML(result) # xpath解析 typeUrl = etree1.xpath("//div[@class='types']/span/a/@href") typeUrlList = [] for url in typeUrl: typeName = url.split("&")[0].split('=')[1] print(f"正在获取【{typeName}】分类下的电影信息......") typeId = url.split("&")[1].split("=")[1] # 根据电影分类获取此分类下的电影总数 totalUrl = f"https://movie.douban.com/j/chart/top_list_count?type={typeId}&interval_id=100%3A90&action=" # 获取到此分类下的电影总数量 movieTotal = json.loads(get_content(totalUrl))['total'] print(f"{typeName}分类下的电影一共有{movieTotal}部") # 根据电影总数量依次获取这些电影 for i in range(movieTotal+1): baseUrl = f"https://movie.douban.com/j/chart/top_list?type={typeId}&interval_id=100%3A90&action=&start={i}&limit=1" movieInfo = json.loads(get_content(baseUrl))[0] # 获取电影Id movieId = movieInfo['id'] getCommentByMovieId(typeName,movieId) -
![根据电影id获取豆瓣电影下的前100条好评]() 根据电影id获取豆瓣电影下的前100条好评 movies = [1291546,6973376] # 导入xpath模块 用于解析页面数据 from lxml import etree # 导入系统模块 用于自动创建目录 import os # 导入requests模块用于发送http请求 import requests # 发起请求获取数据 def get_content(url,data=[],ispost=0): # user-agent 设置头信息 模拟浏览器访问 headers = { "User-Agent": "Mozilla/5.0 (Windows NT 6.1; WOW64) AppleWebKit/537.36 (KHTML, like Gecko) Chrome/63.0.3239.132 Safari/537.36", } if ispost: response = requests.post(url=url, headers=headers,data=data) else: response = requests.get(url=url, headers=headers) response.encoding = response.apparent_encoding return response.text limit = 100 # 遍历电影列表数据,获取电影id for movieId in movies: url = f"https://movie.douban.com/subject/{movieId}/comments?percent_type=h&limit={limit}&status=P&sort=new_score" # 发送请求 获取页面源码 result = get_content(url) # 获取数据 etree1 = etree.HTML(result) # xpath解析 # 标题 title = etree1.xpath("//h1/text()")[0] # 评论人 authors = etree1.xpath("//span[@class='comment-info']/a/text()") # 评论时间 times = etree1.xpath("//span[@class='comment-info']/span[@class='comment-time ']/text()") print(times) # 评论内容 contents = etree1.xpath("//span[@class='short']/text()") moviePath = "./movieCommentData/" if not os.path.exists(moviePath): os.makedirs(moviePath) # 依次遍历,输出数据 s = "=" print(f"{s*30}正在获取电影【{title}】{s*30}") for i in range(len(authors)): print(f"评论人:'{authors[i]}'---评论内容:'{contents[i]}---评论时间:'{times[i].strip()}''") filename = moviePath+'/'+ title + '.txt' with open(filename, 'a+', encoding="utf-8") as f: f.write(f"评论人:'{authors[i]}'---评论内容:'{contents[i]}'---评论时间:'{times[i].strip()}'\n") f.close() print(f"{s*30}电影【{title}】获取完毕{s*30}")
根据电影id获取豆瓣电影下的前100条好评 movies = [1291546,6973376] # 导入xpath模块 用于解析页面数据 from lxml import etree # 导入系统模块 用于自动创建目录 import os # 导入requests模块用于发送http请求 import requests # 发起请求获取数据 def get_content(url,data=[],ispost=0): # user-agent 设置头信息 模拟浏览器访问 headers = { "User-Agent": "Mozilla/5.0 (Windows NT 6.1; WOW64) AppleWebKit/537.36 (KHTML, like Gecko) Chrome/63.0.3239.132 Safari/537.36", } if ispost: response = requests.post(url=url, headers=headers,data=data) else: response = requests.get(url=url, headers=headers) response.encoding = response.apparent_encoding return response.text limit = 100 # 遍历电影列表数据,获取电影id for movieId in movies: url = f"https://movie.douban.com/subject/{movieId}/comments?percent_type=h&limit={limit}&status=P&sort=new_score" # 发送请求 获取页面源码 result = get_content(url) # 获取数据 etree1 = etree.HTML(result) # xpath解析 # 标题 title = etree1.xpath("//h1/text()")[0] # 评论人 authors = etree1.xpath("//span[@class='comment-info']/a/text()") # 评论时间 times = etree1.xpath("//span[@class='comment-info']/span[@class='comment-time ']/text()") print(times) # 评论内容 contents = etree1.xpath("//span[@class='short']/text()") moviePath = "./movieCommentData/" if not os.path.exists(moviePath): os.makedirs(moviePath) # 依次遍历,输出数据 s = "=" print(f"{s*30}正在获取电影【{title}】{s*30}") for i in range(len(authors)): print(f"评论人:'{authors[i]}'---评论内容:'{contents[i]}---评论时间:'{times[i].strip()}''") filename = moviePath+'/'+ title + '.txt' with open(filename, 'a+', encoding="utf-8") as f: f.write(f"评论人:'{authors[i]}'---评论内容:'{contents[i]}'---评论时间:'{times[i].strip()}'\n") f.close() print(f"{s*30}电影【{title}】获取完毕{s*30}") -
![npm安装webpack时遇到卡顿的情况]() npm安装webpack时遇到卡顿的情况 npm安装webpack时遇到卡顿的情况idealTree:webpackdemo: sill idealTree buildDeps解决办法:删除npmsrc 清除缓存 命令行找到其所在位置,删除此文件 npm config get userconfig清除缓存 npm cache clear --force有可能是之前的镜像源停止解析了,所有要更换最新的 npm config set registry https://registry.npmmirror.com查看当前镜像源确保更换成功npm config get registry重新安装npm i webpack webpack-cli --sav-dev
npm安装webpack时遇到卡顿的情况 npm安装webpack时遇到卡顿的情况idealTree:webpackdemo: sill idealTree buildDeps解决办法:删除npmsrc 清除缓存 命令行找到其所在位置,删除此文件 npm config get userconfig清除缓存 npm cache clear --force有可能是之前的镜像源停止解析了,所有要更换最新的 npm config set registry https://registry.npmmirror.com查看当前镜像源确保更换成功npm config get registry重新安装npm i webpack webpack-cli --sav-dev -
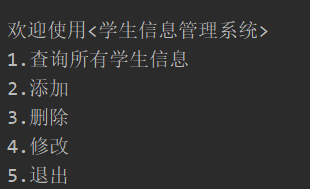
![Python字典列表实现学生信息管理系统]() Python字典列表实现学生信息管理系统 # 需求:学生管理系统 实现 对学生的增删改查 students = [] def getIndexByStuId(stuId): for student in students: if stuId == student['stuId']: # 获取到这个字典对应的索引 return students.index(student) # 欢迎 def welcome(): msg = """ 欢迎使用<学生信息管理系统> 1.查询所有学生信息 2.添加 3.删除 4.修改 5.退出 """ return input(msg) # 查询 def show(): print("----------------正在[查询]--------------------") if students: print("学号\t\t\t名字\t\t\t年龄") for student in students: print(f"{student['stuId']}\t\t{student['name']}\t\t\t{student['age']}") else: print("暂无学生信息,请添加") # 添加 def add(): print("----------------正在[添加]--------------------") # 依次获取用户输入的数据 # 存到字典中 student = {} # 获取用户的学号后,要去查一查此学号是否存在 如果存在则提示用户重新输入 如果不存在 则正常添加 while True: stuId = input("请输入学号:") i = getIndexByStuId(stuId) if i == None: student['stuId'] = stuId student['name'] = input("请输入名字:") student['age'] = int(input("请输入年龄:")) # print(student) # 把字典添加到列表 students.append(student) break else: print("请重新输入新的学号") # 删除 def delete(): print("----------------正在[删除]--------------------") while True: # 接收学号 stuId = input('请输入想要删除的学生的学号') # 获取索引 i = getIndexByStuId(stuId) if i == None: print("学号不存在,请重新输入") else: students.pop(i) print("删除成功") break # for student in students: # if stuId == student['stuId']: # break # # 删除 # students.remove(student) # print(students) # 修改 def update(): print("----------------正在[修改]--------------------") while True: # 接收学号 user_input = input('请输入想要修改的学生的学号(如果想退出请输入"q")') if user_input == 'q': break i = getIndexByStuId(user_input) # None if i == None: print("学号不存在,请重新输入(如果想退出请输入'q')") else: # 根据列表的索引找到列表中的字典 while True: stuId = input(f"请输入新的学号({students[i]['stuId']})[回车表示不修改]") # 根据学号查询索引 index = getIndexByStuId(stuId) if i != index: print("学生id已存在") else: break name = input(f"请输入新的姓名({students[i]['name']})[回车表示不修改]") age = input(f"请输入新的年龄({students[i]['age']})[回车表示不修改]") # # 如果为true说明改了,如果为false说明没改 students[i]['stuId'] = stuId if stuId else students[i]['stuId'] students[i]['name'] = name if name else students[i]['name'] students[i]['age'] = age if age else students[i]['age'] break print(students) pass while True: # 欢迎 num = welcome() match num: case '1': show() case '2': add() case '3': # 查看列表中是否有数据,如果有才往下执行 if students: show() delete() show() else: print("暂无数据,请添加") case '4': # 查看列表中是否有数据,如果有才往下执行 if students: show() update() else: print("暂无数据,请添加") case '5': print("欢迎下次使用") break case _: print("输入有误,请重新输入")
Python字典列表实现学生信息管理系统 # 需求:学生管理系统 实现 对学生的增删改查 students = [] def getIndexByStuId(stuId): for student in students: if stuId == student['stuId']: # 获取到这个字典对应的索引 return students.index(student) # 欢迎 def welcome(): msg = """ 欢迎使用<学生信息管理系统> 1.查询所有学生信息 2.添加 3.删除 4.修改 5.退出 """ return input(msg) # 查询 def show(): print("----------------正在[查询]--------------------") if students: print("学号\t\t\t名字\t\t\t年龄") for student in students: print(f"{student['stuId']}\t\t{student['name']}\t\t\t{student['age']}") else: print("暂无学生信息,请添加") # 添加 def add(): print("----------------正在[添加]--------------------") # 依次获取用户输入的数据 # 存到字典中 student = {} # 获取用户的学号后,要去查一查此学号是否存在 如果存在则提示用户重新输入 如果不存在 则正常添加 while True: stuId = input("请输入学号:") i = getIndexByStuId(stuId) if i == None: student['stuId'] = stuId student['name'] = input("请输入名字:") student['age'] = int(input("请输入年龄:")) # print(student) # 把字典添加到列表 students.append(student) break else: print("请重新输入新的学号") # 删除 def delete(): print("----------------正在[删除]--------------------") while True: # 接收学号 stuId = input('请输入想要删除的学生的学号') # 获取索引 i = getIndexByStuId(stuId) if i == None: print("学号不存在,请重新输入") else: students.pop(i) print("删除成功") break # for student in students: # if stuId == student['stuId']: # break # # 删除 # students.remove(student) # print(students) # 修改 def update(): print("----------------正在[修改]--------------------") while True: # 接收学号 user_input = input('请输入想要修改的学生的学号(如果想退出请输入"q")') if user_input == 'q': break i = getIndexByStuId(user_input) # None if i == None: print("学号不存在,请重新输入(如果想退出请输入'q')") else: # 根据列表的索引找到列表中的字典 while True: stuId = input(f"请输入新的学号({students[i]['stuId']})[回车表示不修改]") # 根据学号查询索引 index = getIndexByStuId(stuId) if i != index: print("学生id已存在") else: break name = input(f"请输入新的姓名({students[i]['name']})[回车表示不修改]") age = input(f"请输入新的年龄({students[i]['age']})[回车表示不修改]") # # 如果为true说明改了,如果为false说明没改 students[i]['stuId'] = stuId if stuId else students[i]['stuId'] students[i]['name'] = name if name else students[i]['name'] students[i]['age'] = age if age else students[i]['age'] break print(students) pass while True: # 欢迎 num = welcome() match num: case '1': show() case '2': add() case '3': # 查看列表中是否有数据,如果有才往下执行 if students: show() delete() show() else: print("暂无数据,请添加") case '4': # 查看列表中是否有数据,如果有才往下执行 if students: show() update() else: print("暂无数据,请添加") case '5': print("欢迎下次使用") break case _: print("输入有误,请重新输入") -
![PHP实现万年历]() PHP实现万年历 <style> * { margin: 0; padding: 0; } .box { display: flex; border: 1px solid red; flex-wrap: wrap; justify-content: center; } table { width: 20%; height: 300px; background: pink; margin: 5px; } td { text-align: center; } .tr1 { font-size: 20px; color: red; } .active { color: blue; } .h1 { text-align: center; font-weight: 100; color: blueviolet; } </style> <?php $year = 2025; // 获取当前的年月 $month = date('n'); $d = date('d'); $html="<h1 class='h1'>{$year}年万年历</h1>"; $html .= "<div class='box'>"; // 1.因为每一年都有12个月,所以要循环12次,每月都是1个table表格 for($m=1;$m<=12;$m++){ $html.= "<table>"; // 输出年月 $html.="<tr class='tr1'><th colspan='7'>{$year} 年 {$m} 月</th></tr>"; // 输出星期几 $html.="<tr><td>日</td><td>一</td><td>二</td><td>三</td> <td>四</td><td>五</td><td>六</td></tr>"; // 每个月开头输出对应的空td 获取指定的年月1号对应是星期几? $week = date("w",strtotime("$year-$m-1")); $html .="<tr>"; for($i=1;$i<=$week;$i++){ $html.= "<td></td>"; } // 根据年月获取对应的这个月的总天数 $days= date("t",strtotime("$year-$m")); for($j=1;$j<=$days;$j++,$i++){ // 如果是7的倍数就该换行了 // 必须是当前这个月的当前这个日 if( $month == $m and $j == $d ){ $html.="<td class='active'>{$j}</td>"; }else{ $html.="<td>{$j}</td>"; } if($i%7==0){ $html.= "</tr>"; } } $html.= "</table>"; } $html .="</div>"; echo $html;
PHP实现万年历 <style> * { margin: 0; padding: 0; } .box { display: flex; border: 1px solid red; flex-wrap: wrap; justify-content: center; } table { width: 20%; height: 300px; background: pink; margin: 5px; } td { text-align: center; } .tr1 { font-size: 20px; color: red; } .active { color: blue; } .h1 { text-align: center; font-weight: 100; color: blueviolet; } </style> <?php $year = 2025; // 获取当前的年月 $month = date('n'); $d = date('d'); $html="<h1 class='h1'>{$year}年万年历</h1>"; $html .= "<div class='box'>"; // 1.因为每一年都有12个月,所以要循环12次,每月都是1个table表格 for($m=1;$m<=12;$m++){ $html.= "<table>"; // 输出年月 $html.="<tr class='tr1'><th colspan='7'>{$year} 年 {$m} 月</th></tr>"; // 输出星期几 $html.="<tr><td>日</td><td>一</td><td>二</td><td>三</td> <td>四</td><td>五</td><td>六</td></tr>"; // 每个月开头输出对应的空td 获取指定的年月1号对应是星期几? $week = date("w",strtotime("$year-$m-1")); $html .="<tr>"; for($i=1;$i<=$week;$i++){ $html.= "<td></td>"; } // 根据年月获取对应的这个月的总天数 $days= date("t",strtotime("$year-$m")); for($j=1;$j<=$days;$j++,$i++){ // 如果是7的倍数就该换行了 // 必须是当前这个月的当前这个日 if( $month == $m and $j == $d ){ $html.="<td class='active'>{$j}</td>"; }else{ $html.="<td>{$j}</td>"; } if($i%7==0){ $html.= "</tr>"; } } $html.= "</table>"; } $html .="</div>"; echo $html; -
![04-创建自己的第一个model]() 04-创建自己的第一个model 1.修改mysql的配置信息 settings.py 编辑DATABASES 默认sqlite3改成修改mysql2.cmd 命令行安装mysqlclient 命令:pip install mysqlclient3.打开blog项目里面的models.py 创建自己的model类 Article为表名 继承models.Model4.完成数据迁移 python manage.py makemigrations app名称(可选 不写默认所有应用)5.继续执行python manage.py migrate 来创建表6.最终会在migrations 里生成0001_initial.py 看到字段结构7.命令python manage.py sqlmigrate blog 0001 查看建表语句8.查看数据表 已经创建成功9.手动写入一条记录,读取,模板中展示
04-创建自己的第一个model 1.修改mysql的配置信息 settings.py 编辑DATABASES 默认sqlite3改成修改mysql2.cmd 命令行安装mysqlclient 命令:pip install mysqlclient3.打开blog项目里面的models.py 创建自己的model类 Article为表名 继承models.Model4.完成数据迁移 python manage.py makemigrations app名称(可选 不写默认所有应用)5.继续执行python manage.py migrate 来创建表6.最终会在migrations 里生成0001_initial.py 看到字段结构7.命令python manage.py sqlmigrate blog 0001 查看建表语句8.查看数据表 已经创建成功9.手动写入一条记录,读取,模板中展示